Creating a list
Lists live in the Lists section of the main menu. Creating one takes a name and, optionally, a short description to remind you later what the list is for.
There's no limit to how you use them. A few that come up often:
- Parts I always want in stock: your core inventory, the items you never want to run out of.
- Parts ordered: what you've already bought and are waiting on, so you don't order it twice.
- To source: items you've spotted as worth adding, kept aside until you find them at the right price.
Lists currently hold parts and minifigures. Inside a list, each of them gets its own tab, and both behave exactly like the tables you already use elsewhere in BL Metrics.
Adding items to a list
One item at a time
Every row in the parts and minifigures tables carries a list badge, and so does every item page. Click it, pick a list, set a quantity and a condition, and the item is in.
The badge then shows which lists the item belongs to. An item can sit in several lists at once, and from that same badge you can add it to another list or remove it from one.

Adding in bulk
Adding items one by one is fine for a handful, but you rarely have to. Each row has a checkbox, so you can select several items and add them all in one go. The checkbox in the header selects everything on the current page.
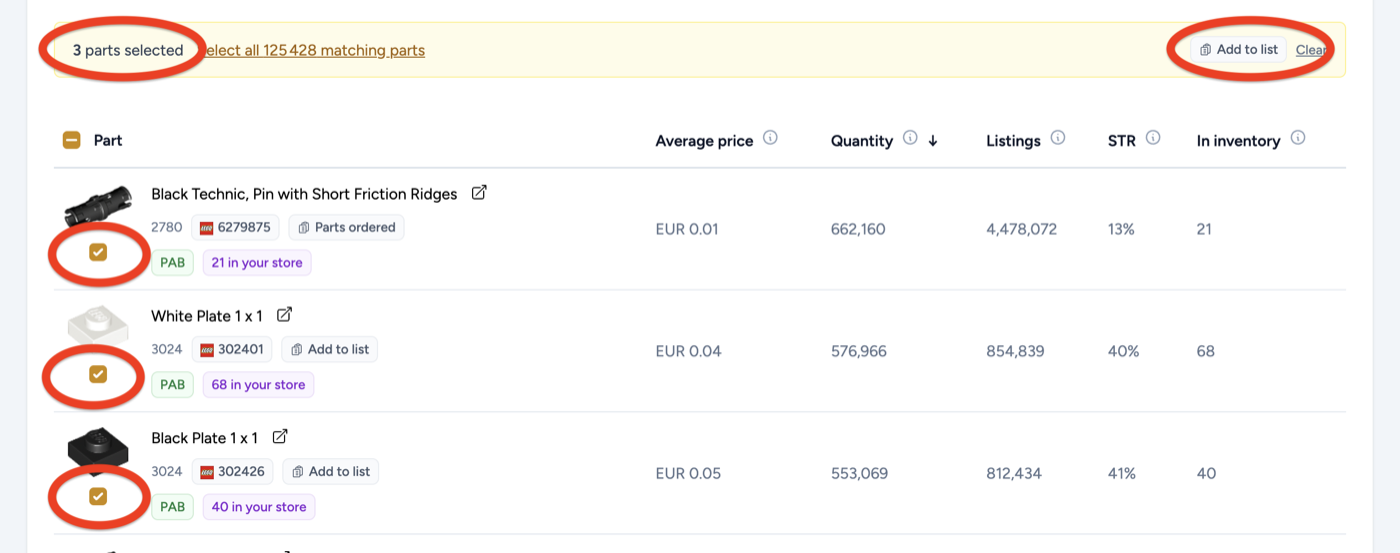
And you can go further than the page you're looking at. Once a selection is active, you also get the option to select every item matching your filters, across all pages. So if your filters return 188 results spread over four pages, all 188 go into the list in a single click.
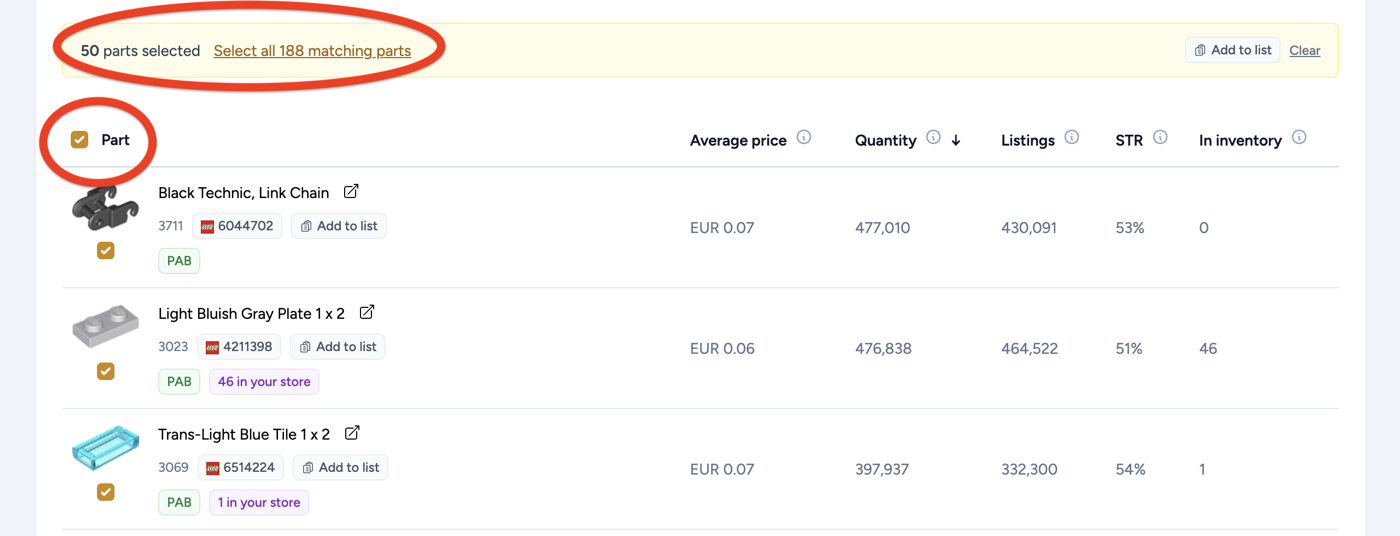
A quick way to build a starter list: go to the parts table, sort by quantity sold in your region and condition, select the page, and add the lot to a list. In two clicks you have the best sellers of your market saved as something you can measure your own stock against.
Working inside a list
A list is a normal BL Metrics table, so everything you already know applies: enable the columns you care about, reorder them, choose which filters to show, sort by any column, and save presets. See the Tables tips and tricks guide for the full detail.
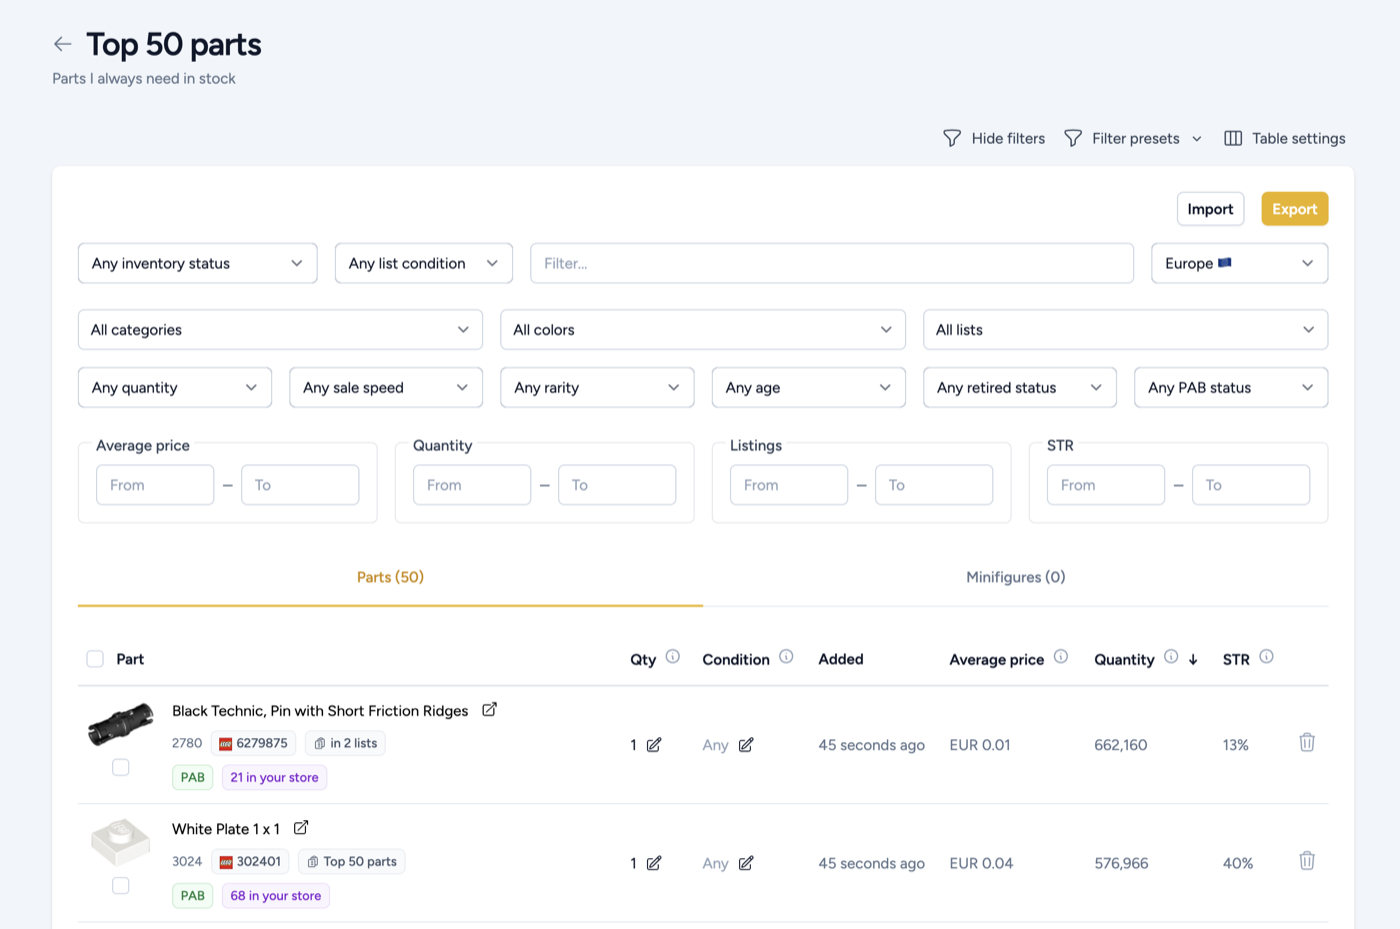
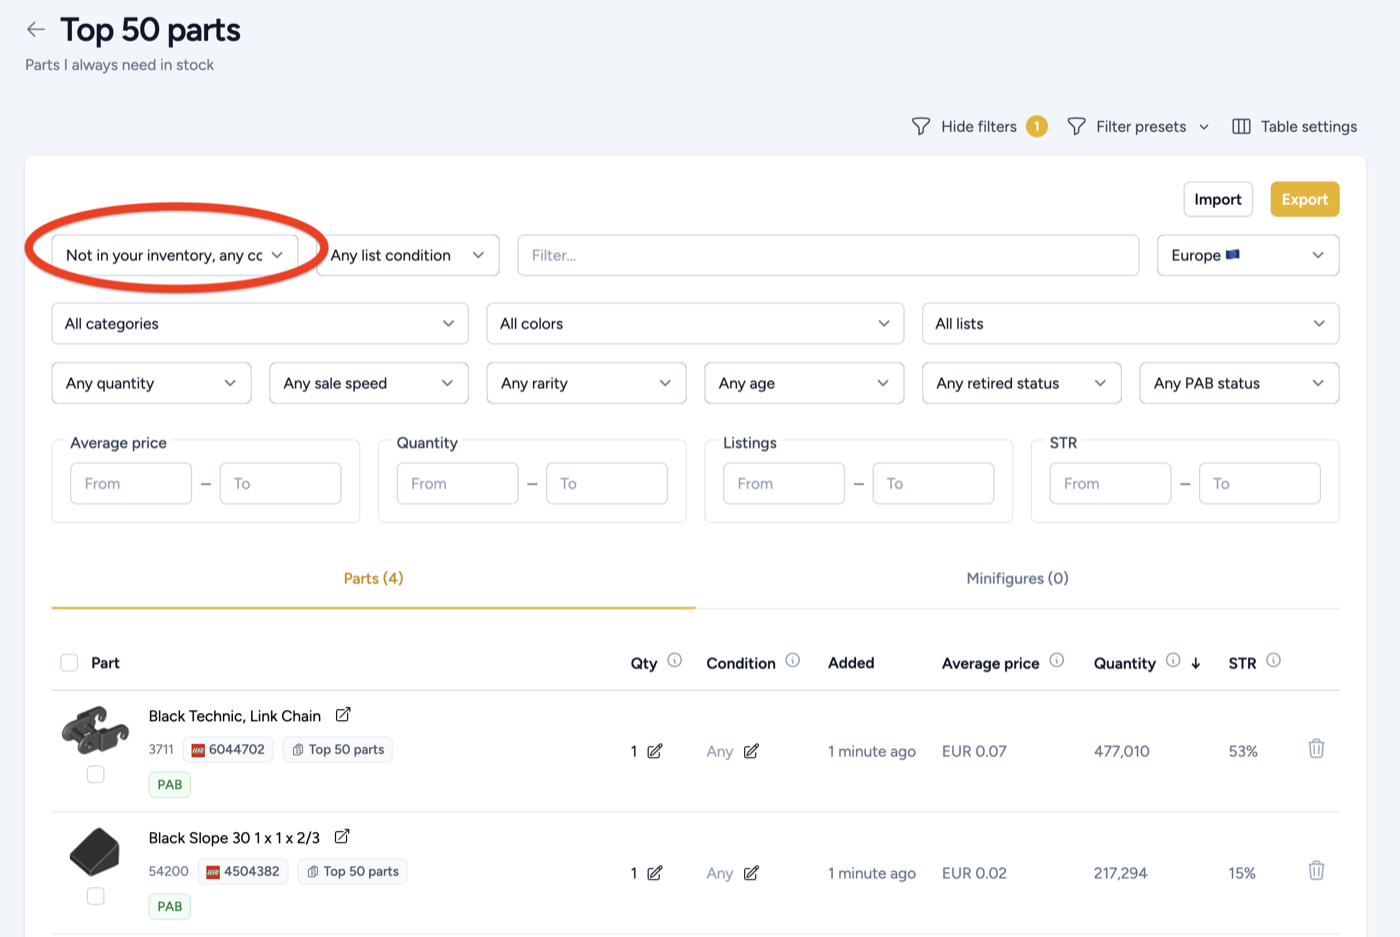
That's what makes a list useful rather than decorative. Take a list of parts you always want in stock, add the not in your inventory filter, and you immediately have the answer to a question that would otherwise take a spreadsheet: which of my must-have parts am I not carrying at all right now?
Using lists as a filter
This is where lists stop being a place you store items and start being a tool. Wherever you see the lists filter, you can narrow a table down to the items in one of your lists: in the parts and minifigures tables, in your store inventory, in the restock checker, and more.
Like the categories and colors filters, the lists filter is flippable. Select a list once to include it, click it again to exclude it. Combining the two is where it gets interesting:
- Include your core list, exclude what you've already ordered: what's left is exactly what you still need to source.
- Include a list in your store inventory: see every lot you hold for those items, and how much stock is left on the parts you're waiting for.
- Include a list in the restock checker: focus the restock analysis on the items you actually care about instead of your whole inventory.
And because these are ordinary filters, you can stack them with everything else. Show me the items from my core list that I'm running low on, that I have not ordered yet, and that are currently available on Pick A Brick. That's one filter combination, and it's a sourcing decision made.
Exporting a list
Any list can be exported in three formats:
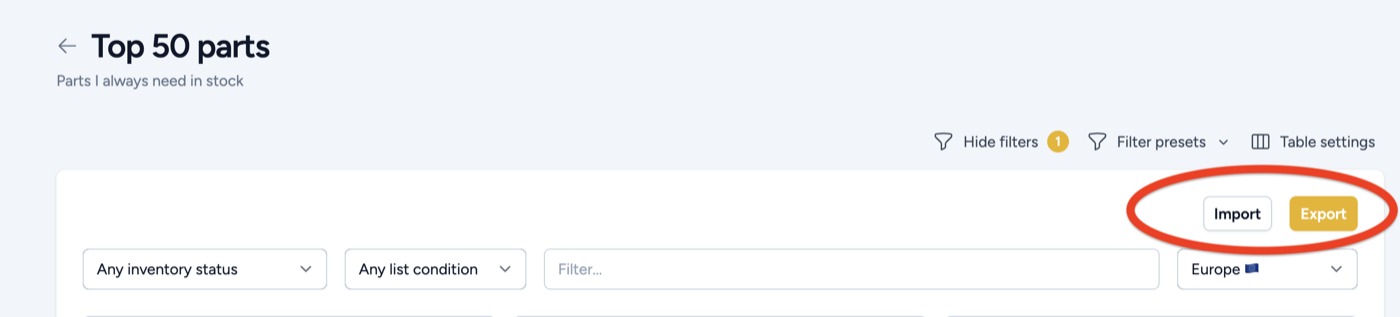
- BrickStore file: to carry on working with the items in BrickStore.
- BrickLink XML: to turn the list into a wanted list on BrickLink.
- LEGO Pick A Brick CSV: to upload straight to lego.com and fill your cart without typing a single reference by hand.
You also choose what gets exported. Entire list takes every part and every minifigure it contains. Currently filtered takes only what your filters are showing right now.
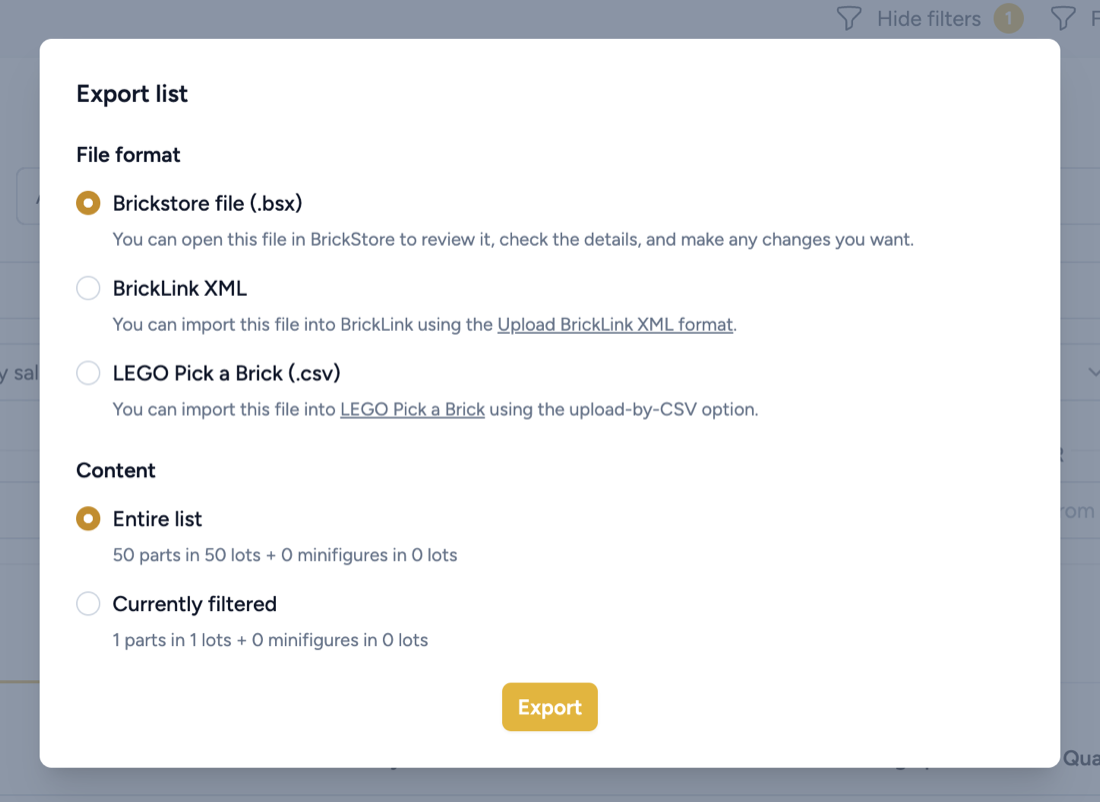
The currently filtered option saves you from creating throwaway lists. Filter a list down to the items you're not stocking, export that selection, and you get a file with just those items in it, without touching the list itself.
Importing a list
Lists work in the other direction too. If you already keep your wanted items on BrickLink, export the wanted list as XML and upload it here to create the list in one step. A BrickStore file works the same way.
It's the fastest way to get started if your parts are already organized somewhere else.
Summary
Lists are simple on the surface: a name, a description, and a set of parts and minifigures. What makes them worth setting up is everything they connect to. Build a list once, and it becomes a filter in your inventory, in the restock checker and across the catalog, a file you can hand to BrickLink or Pick A Brick, and a benchmark you can measure your own stock against.